Inserting the Watermark

1. Download the watermark  (link)
 (Move the cursor over the picture on the right, click mouse right button, and chose "save the picture" to save it into the directory of your intent. (If you are reading this document, use just copy & paste between this document and your thesis)

 2. Add first the watermark to the front cover of your thesis.
Insert the watermark just above the page number of a page for every page of your thesis, except the scanned images, such as Letter of Authority, Certifiable of Passed Oral Examination (both in Chinese and in English), or Appendixes.

3. If there happens to be a table at the position the watermark is to be inserted, move the cursor beyond and to the right of the table before inserting the watermark. This will make the watermark centered properly.

4. All the watermarks inserted must be in the lower right corner properly. A watermark partly covered by any other images or pictures is acceptable. If you still fail to find any place to insert a watermark, just let it covered.

5. Then inserting the watermark, do not change the size and color of the image.

NoteIf you are formatting your thesis by using Latex that has no way to insert a watermark, the watermarks for the context can be ignored. However, please make only the cover of your thesis by using Words and make it converted together with the context.

The Watermark of

Southern Taiwan University

 To insert the watermark (In MS Word)

1. Make sure your thesis constituted by only one Word file. If not, please make all pages into one file, and ordering the page number of your thesis.

2. Copy the STUT watermark logo below:

3.Move the cursor to the proper position of the context and choose from the topmost menu barView(V) → Header and Footer(H).
It would make the watermark to appear on every page.

4.Paste the STUT watermark logo into the Footer.

 5.AttentionWhen you insert the watermark, the layout of your context would be disorder. Do not be nervous, continue the next step, the context would be restored.

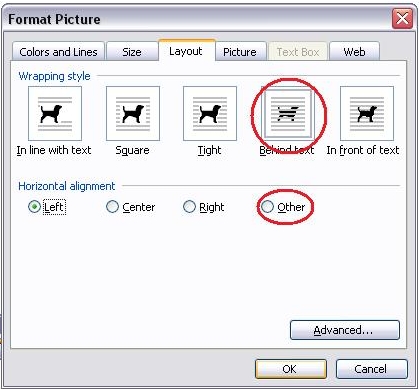
 6.In the Format Picture window, select <Layout>then click on the <Behind text> and then <Other>, finally click on <Advance...>

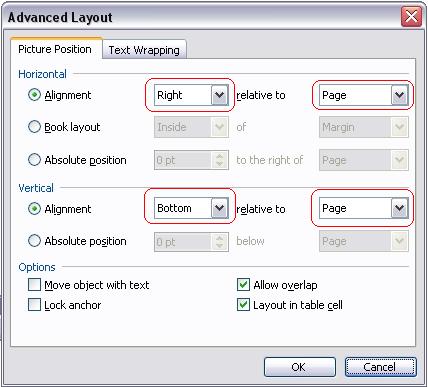
7. When click on the <Picture Position> of the topmost menu bar to bring up its configuration page. For the Horizontal configuration, choose <Alignment> and choose Right and Page respectively for the two fields of this configuration. For the Vertical configuration, also choose <Alignment> and choose Below and Page respectively for the two fields of this configuration.

8. Back the context window, click on the Close. Then the watermark will appear on every page. Save the file.

 9.The page should look like so: